
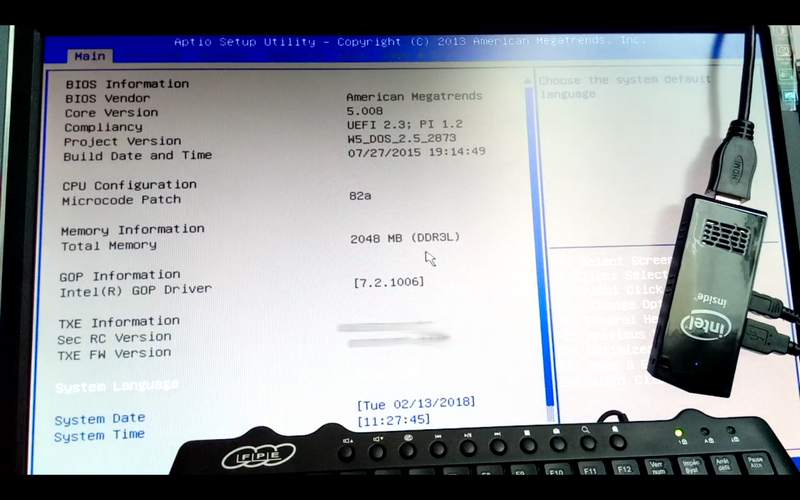
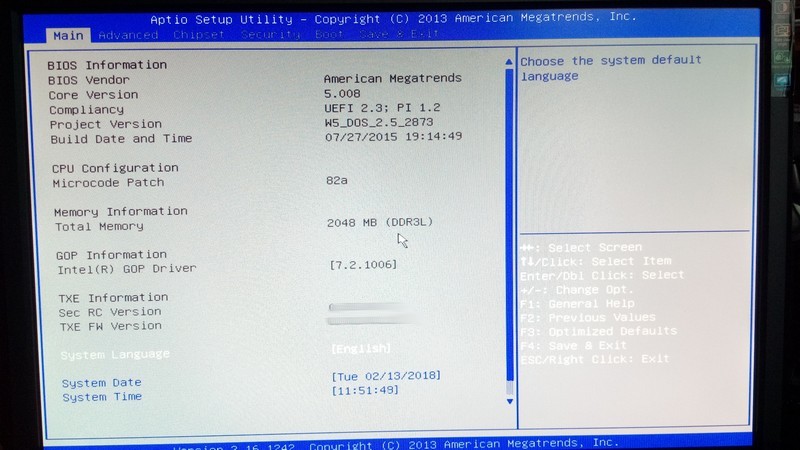
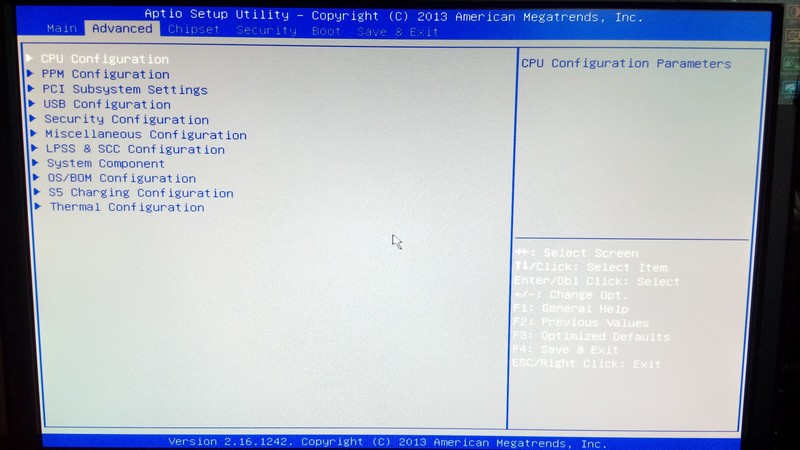
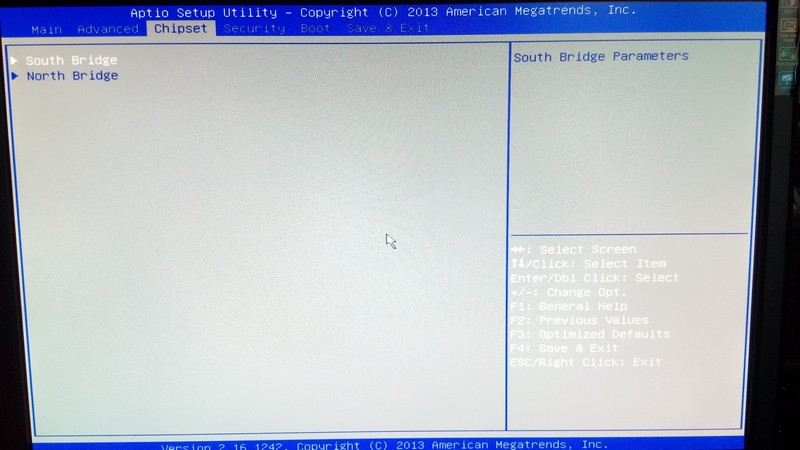
Ci-dessous le Bios UEFI du Wintel W5.
Mais avant de poursuivre,
Attention !
Je ne suis en aucun cas responsable des dommages occasionnés suite à une mauvaise manipulation.Je décline toute responsabilité sur l’utilisation que vous faites de mes tutoriels ou de mes astuces.
Je vous déconseille fortement de modifier votre Bios UEFI.
Pour accéder au bios UEFI au démarrage de la clé Wintel W5, il faut appuyer sur le bouton Power pour démarrer la clé, ensuite attendre que la LED du pavé numérique s’allume sur le clavier et d’appuyer rapidement et une seule fois sur “Echap” ou “ESC” du clavier pour être dans le Bios UEFI.
Courte vidéo, montrant le démarrage de la clé Wintel W5, pour l’accès au Bios UEFI. (méthode simple)
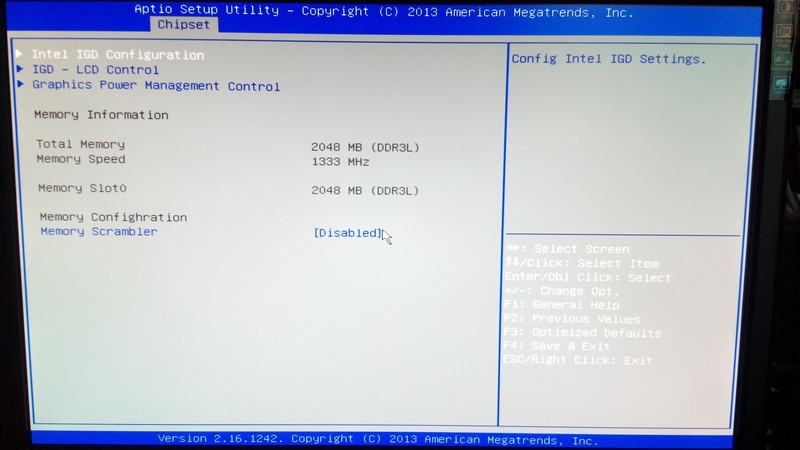
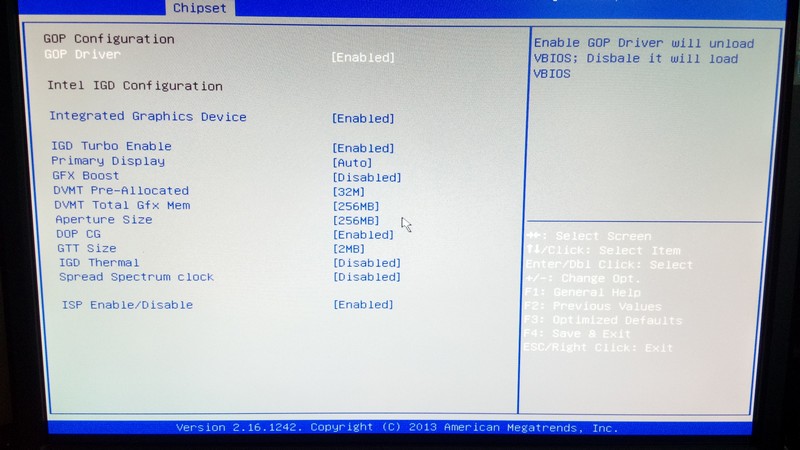
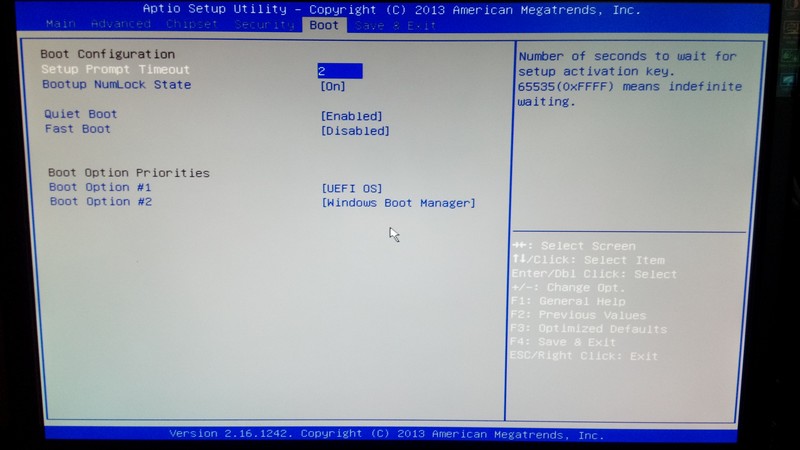
Les pages du Bios UEFI.


En cours pour les autres pages …
Hello.
I don’t speak french, sorry. So I have to wrote this comment in english. Hope you can deal with this 🙂 This is very interesting tutorial. Maybe you know how to do a fresh installation of Windows 10 on this device? Because my bootable pendrive with Windows 10 installation won’t boot up… So I think that some BIOS features block this possibility.
Any help?
Cheers from Poland!
Michael.
Hi,
first step.
It’s important create a key USB windows 10 for a computer since bios UEFI. (Otherwise from a PC under standard Bios it does not work!)
Or Create a key USB windows 10 with Rufus and test différent options …
Second step.
And follow the procedure to boot from the USB key
… I’ll do a test if I have time …
Normally you have to be under Windows 10 on Wintel W5.
Insert the USB key with the latest build from Microsoft (Windows Home 32 bit) and start the update if it does not start automatically.
To free some space on Wintel W5, read the tutorials here:
https://castman.fr/wordpress/tutoriels/comment-liberer-de-lespace-de-stockage-sur-16-ou-32-go-pour-installer-les-mises-a-jour-de-windows-10-mes-solutions/
https://castman.fr/wordpress/tutoriels/des-solutions-pour-liberer-de-lespace-de-stockage-sur-16-go-deuxieme-partie/
…
Solution to start the installation from a Windows 10 USB key.
Insert to Windows 10 USB Key and Keyboard / Mouse with USB HUB.
Start Wintel W5 when the keypad led turns on, press ESC to enter the UEFI bios.
In the tab “Save and Exit” go down on “Boot override” and choose the name of your USB stick example in my case I have “UEFI: Philips USB Flash DriverPHAP …”
The Wintel starts on the Windows 10 installation key.
Hi.
Many thanks for your replies.
I tried to use Rufus 3.0 to make a bootable USB key but even when I’m in the tab “Save and Exit” , going down on “Boot override” and I choose my USB key then screen is black for a quick while and return to the “Save and Exit” tab in BIOS.
I used default settings in Rufus when creating bootable USB drive…
PS: Do you tried to install Android X86 project on this mini PC? default it was an old Android 4.2 pre-installed. I’m wondering about Android-x86 7.1-r2 (Nougat-x86) …
OK. I found my mistake… I tried to run 64bit installer… 32bit installer works without any problems…
Hello,
Black screen means wrong USB stick format or UEFI bios blocking and boot protection.
I have just done the test with the creation of a USB key on a Windows 10 machine with a standard bios and it works from the new tool downloadable directly from the microsoft site.
version “MediaCreationTool1803”.
I will add screenshots of UEFI Bios to compare if a boot protection is still active.
You mean 64 bit installer works fine for you?
For me only 32 bit installer works.
Perfect !
No, UEFI Bios of the Wintel W5, is not compatible 64bits but only 32 bits.
I use the same USB key for PCs / Tablets … in 32 or 64 bits. I just select the version of Windows 10 corresponding to the version installed on the hardware.
OK. All clear 🙂
Thanks.
PS: How about Android X86 project? Did you try this OS? Maybe it will be good solution to replace old preinstalled Android 4.x by new build.
No, sorry.
I would rather have tried a Linux version …
There is an option in the bios that may work to boot from a key under Linux (Ubuntu / Linux Mint …) But I have not tried!
I had enough trouble with this Windows key …
OK.
I will try to install Android X86 next to Windows 10.
I will let you know about the results.
Cheers!
PS: in Ubuntu Live I made a full DD image of whole eMMC memory so in the case of emergency it will be simple to roll-back whole device.
Good luck…
I will maybe test Linux on it …
Hi castman.
Hope you are well today 🙂
So I already have installed Windows 10 and Android X86 7.1 next to Windows.
All is good and all is working perfectly.
But… one thing is very annoying and I don’t know how to solve the problem.
When Android X86 was installed then GRUB2 was installed also.
And in GRUB2 I can choose which OS I want to boot (Android or Windows).
But the GRUB show up only when I go to the BIOS and in the tab “Save and Exit” on “Boot override” I choose Android X86 option (please take a look at attached images – http://mtvk.pl/pest_poland/IMG_9016.JPG )
Default device show up old ‘grub’? when I have only Windows logo and what is interesting – Windows can’t boot properly from this screen- http://mtvk.pl/pest_poland/IMG_9017.JPG
And the question is how can I disable the default screen with OS choosing? Do you know that?
Cheers.
Hi,
No, I do not have information on that.
This is the UEFI bios that manages this, there is an option in the UEFI that modifies / Enable/Disable the boot screen, but I do not know which one … It’s normally possible to add Android X86 by modifying a file that open in the UEFI bios.
The UEFI bios of the Wintel is old and it is necessary to search on the Net of information on this one.
I am stuck with starting a 32-bit Linux on a 32-bit UEFI bios while Linux distributions are running in UEFI only in 64-bit version!
Sorry I can not anymore …
Information:
https://www.malekal.com/dual-boot-changersupprimer-le-demarrage/
http://news.brest-pc.fr/news/biosuefilegacywindows-boot-manager
Good reading…
I’ll tried to find any solution in BIOS and with 3rd party Windows apps.
But without success right now :/
It’s strange that Android option is missed from boot screen and Windows not.
I don’t know how to change/remove this :/
Cheers.